Learn How to Forward Email to Multiple Users in Office 365 – Complete Guide
Are you looking for a way to forward emails from one Office 365 account to another? Then, you have reached the right page, cause here we’ll discuss everything you need to know about email forwarding in Office 365. So, stay tuned with us till the end.
Emails are an important part of any business since they contain various sensitive information. In some scenarios, there arises a need to forward the old emails to another account. Let’s have a look at one of the user’s queries and try to understand the situation.
“Hi! One of the employees left our organization. And, now we have to forward approximately thousands of Office 365 emails from his account to another. Since there are a huge number of emails that need to be forwarded, I’m not sure how to do it effectively. Also, I can’t risk losing a single email. So, I would really appreciate it if anyone could suggest a fast & secure approach to forwarding the emails. Thanks in advance! ”
Now, such types of scenarios compel us to think about the below question.
5 Easy Steps to Forward Email to Multiple Users in Office 365
- Step 1. Download, Install & Run the tool.
- Step 2. Opt Office 365 as Source & Destination.
- Step 3. Choose Email & Apply Date Filter.
- Step 4. Login via Office 365 Admin Credentials.
- Step 5. Validate Permission & Click on Start.
Is It Even Possible to Forward Bulk Emails from One Office 365 Account to Another?
Just like the above user many of you might have similar conditions where you think forwarding email is the best option. Is it though?
Well, in case you have very few emails to forward, or if you want to receive future emails, then following the instructions provided by Microsoft to manually forward emails might be enough.
Step By Step Guide to Forward Email to Multiple Users in Office 365
Step 1. Log in to the source user account.
Step 2. Open Outlook and Navigate to Home.
Step 3. Browse to the Rules section & Choose Manage Rules then select Alerts.
Step 4. Now, click on New Rule > choose Apply rule on the message I receive located near the bottom of the list, then hit the Next button.
Step 5. Choose the Yes option when windows appear asking “This rule will be applied to every message you receive”.
Step 6. Select the actions to redirect them to persons or a public group and stop processing more rules from the next list.
Step 7. Click the underlined phrase people or public group in the bottom part of the window.
Step 8. Enter the Email ID to forward mail to in the To field, then click OK & click on Finish.
But, for emails that are in thousands or ten-thousands in number to be forwarded then it can get quite a tedious process to go by the manual approach. Moreover, you can only forward the upcoming emails that would be received in this mailbox.
However, using this method you can not forward old emails available in the source user mailbox. So, what can you do to avoid the manual process?
Also Read: How to Save Office 365 Mailbox Emails to Desktop Hard Drive?
Don’t worry, there is a full-proof solution for that.
Many experts suggest that instead of forwarding you can migrate the emails from one Office 365 to another. In this way, you can overcome the genuine inconveniences of email forwarding.
Why is Migrating Office 365 Emails from One Account to Another a Better Option?
First of all, you will save a lot of time and energy. Secondly, you will get rid of the clumsy situation of email forwarding. How?
Well, when you forward a bunch of emails to another account, it gets merged with other emails at the destination. As a result, it becomes difficult to manage & organize the emails. And, migrating emails fixes this issue since it maintains folder hierarchy at the target even after the migration.
There are various other benefits of transferring emails(provided you have the right tool to execute the migration). Some of the advantages are;
- You can apply a Date Filter for selective email migration. Just select the From & To date and you are good to go.
- Further, you can migrate more than one account at a time.
- Also, you will get an option to set Account-based priority migration where you can choose the account that you want to migrate at first.
Now, comes the question, where can you find such a tool to perform the migration?
Most Reliable Way to Forward Email to Multiple Users in Office 365 Quickly
Well, it’s not that difficult. Simply follow the expert recommendation. Many IT admins around the world recommend taking the help of the Most Secured Office 365 Migration Tool to migrate the Office 365 mailbox data to another account.
So, let’s get to know more about the tool.
Easily Migrate / Forward Emails from One Office 365 Account to Another Using The Trusted Software
As the heading suggests, with the help of the software, any user(both technical and non-technical) user can execute the process without any error.
Whether you have a few emails or thousands of emails, it is possible to migrate the same through the tool.
Along with the advantages of migrating discussed in the previous section, there are some additional benefits you can get using the software. Such as;
- Not just emails, you can also migrate contacts, calendars, and tasks.
- There is a facility to perform Office 365 to Office 365 migration in different domains as well as in the same domain.
- In case some of the items are not being migrated in the initial run then you can easily Re-run the entire process.
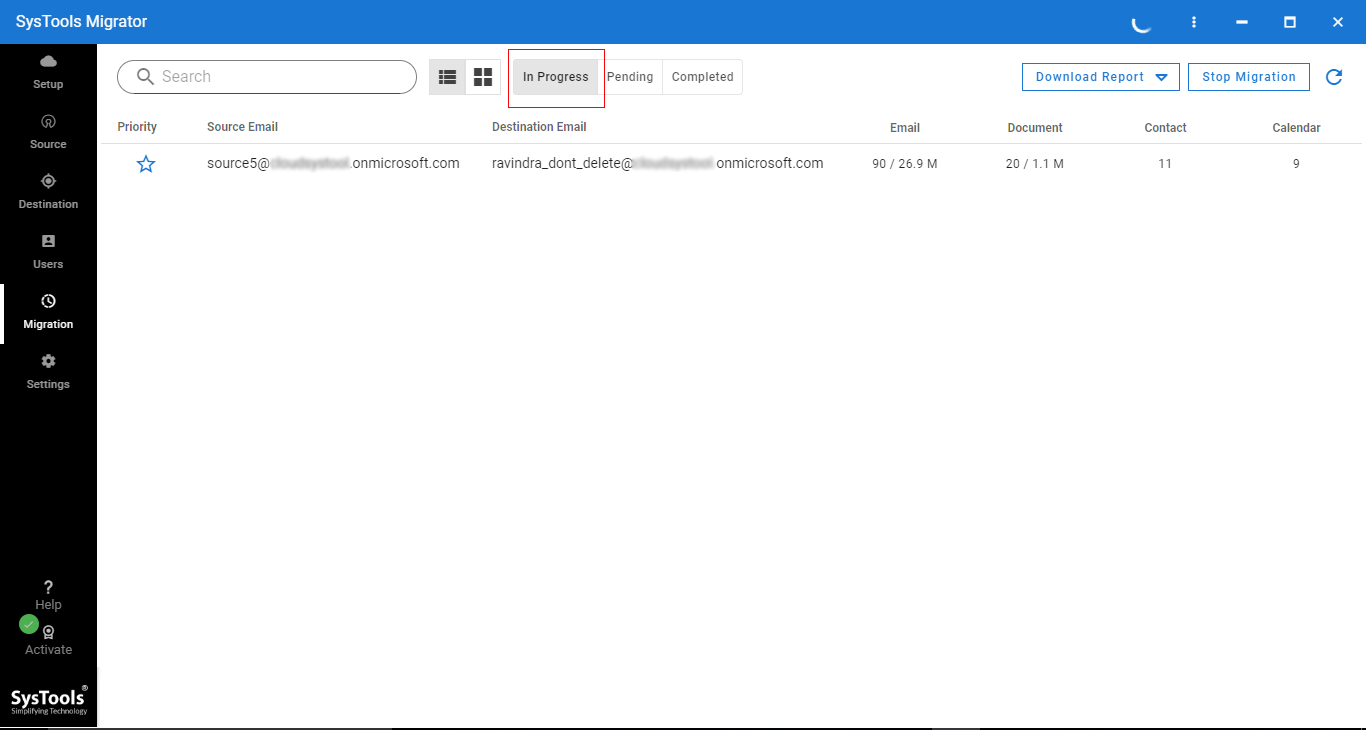
- You can see the current status as well as the final report of the migration process.
And many more…
Now, let’s have a look at the software procedure for email migration.
Must Read: Quick Guide for Office 365 Group to Office 365 Group Mailbox Migration
Simple Software Working Steps to Forward Email to Another User in Office 365
The steps are really simple and easy to conduct.
Step 1. Download the migration kit from the above link and run it on your computer.
Step 2. Then, go to the ‘Setup’ section, and choose ‘Office 365’ as both the source & destination to forward emails from one Office 365 account to another.
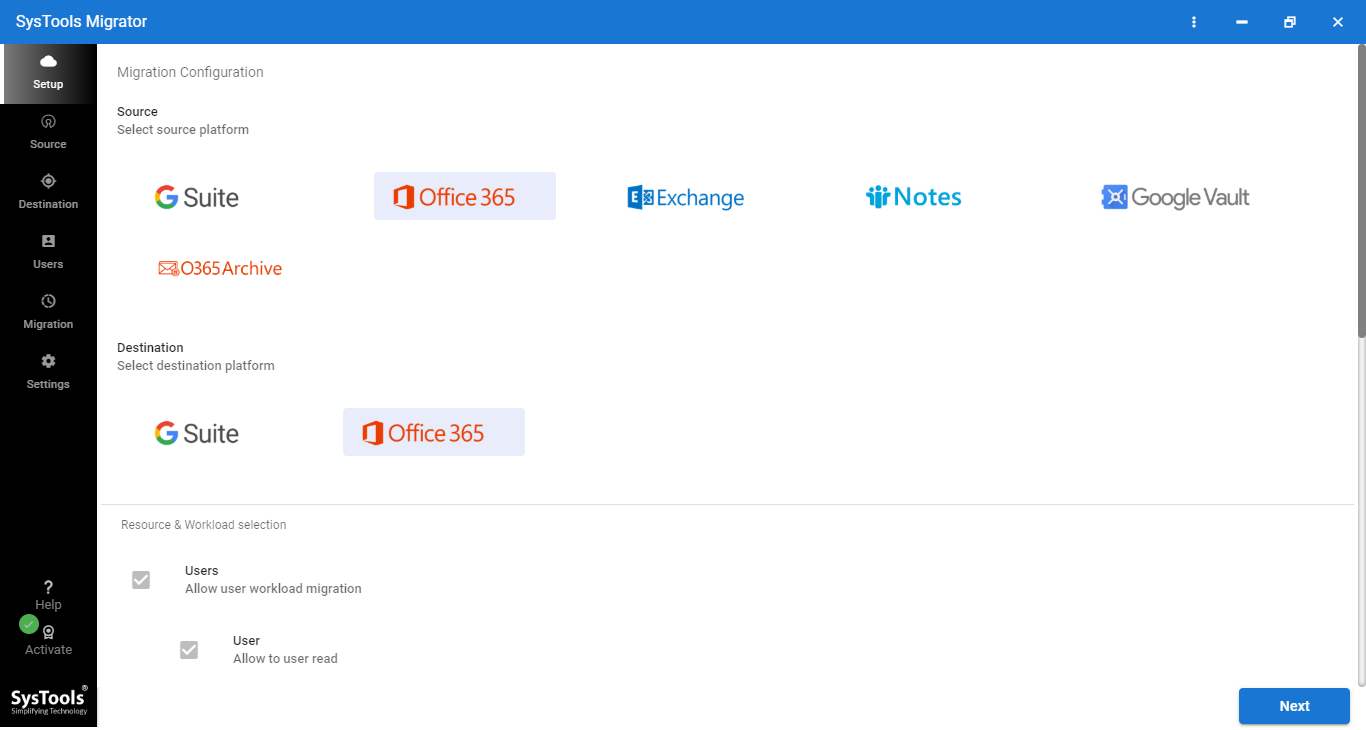
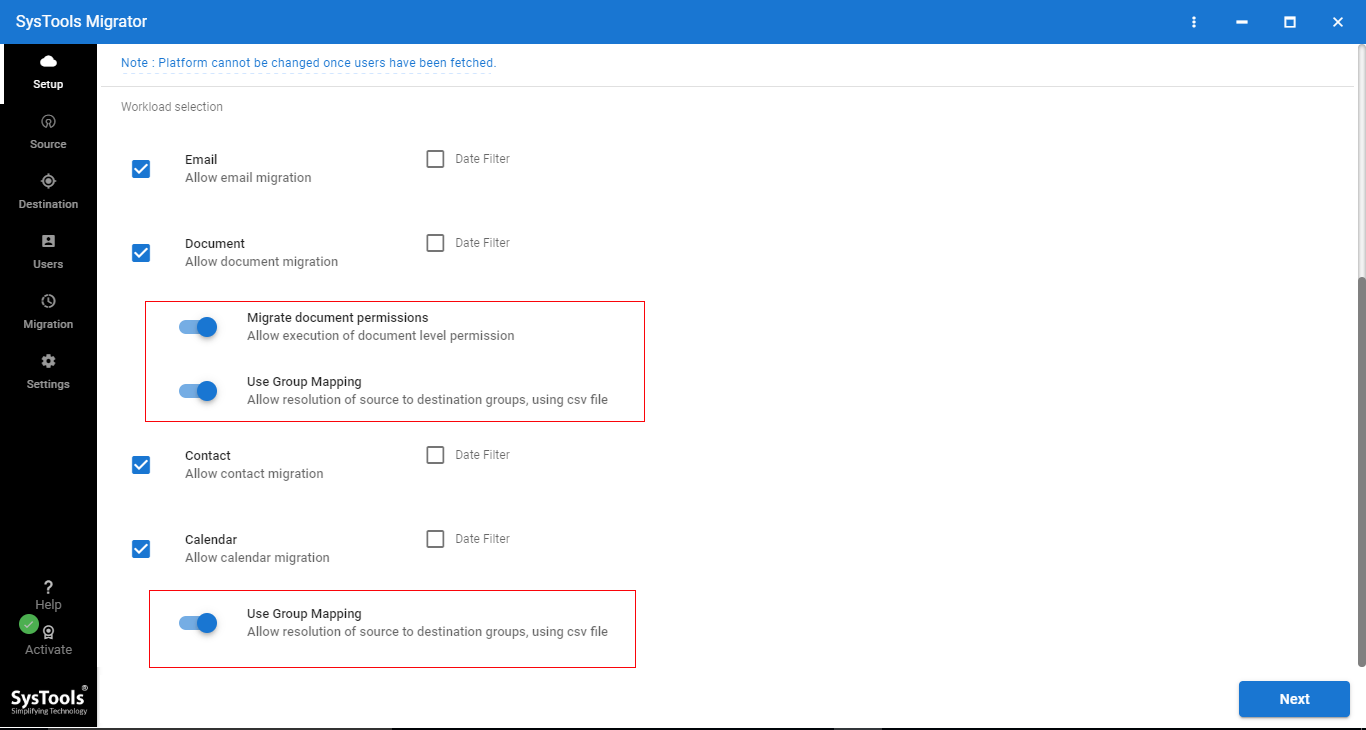
Step 3. Next, scroll down, and click on the checkboxes next to the email. (You can also choose contacts, calendars & tasks)
[TIP: Apple the ‘Date Filter’ and migrate only the selected items. To do so, click on the Date filter checkbox, and choose the From & To dates.]
Step 4. Now, move to the Source section, and enter Office 365 admin ID & application ID. After that, click on the Validate button & verify the necessary permissions.
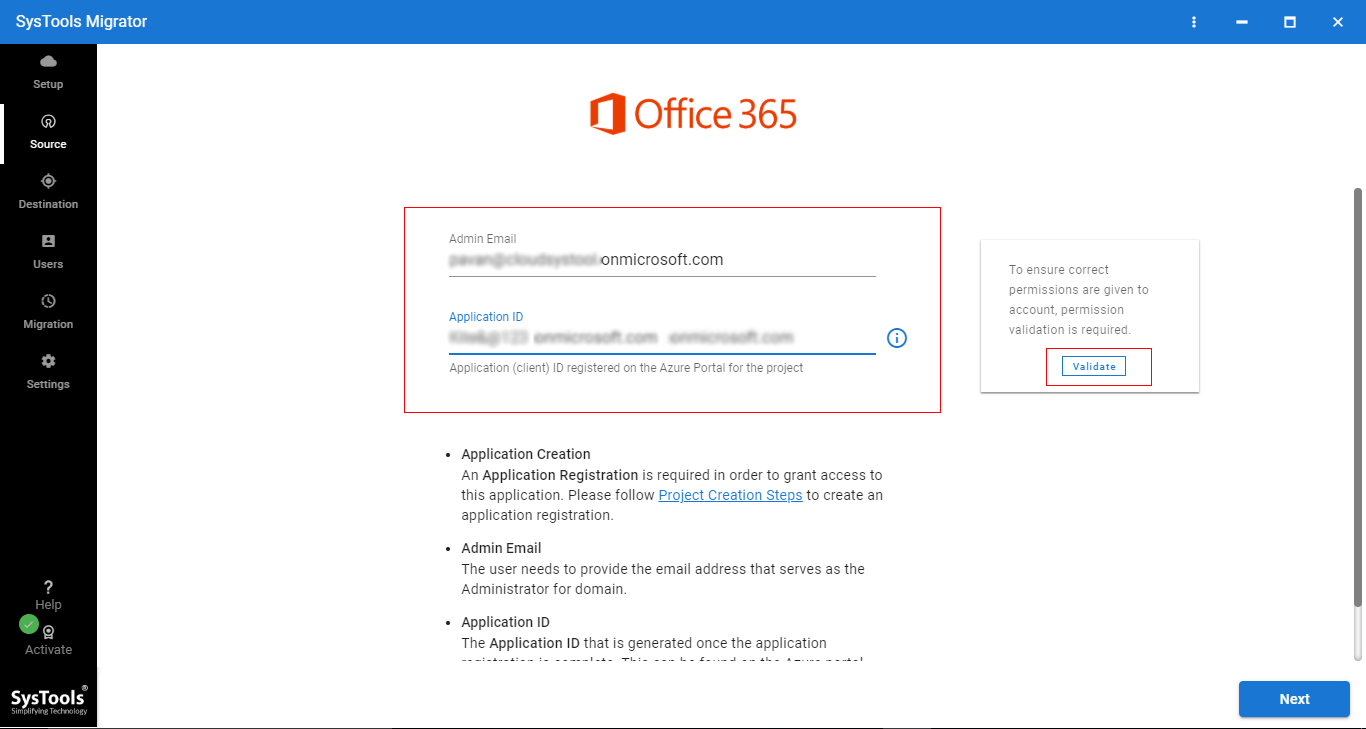
Step 5. Once you confirm that the verification process is done, you can click on the Next button to forward emails from one Office 365 account to another.
Step 6. Next, go to the ‘Destination’ tab. Enter the Office 365 admin ID & Application ID for the destination and press the Validate button.
Step 7. Once all required permissions turn green, you can click on the ‘Next’ button to proceed.
Step 8. After that, map the source users with the destination. For that, define the source users from any of the three options: fetch users, import users, and download the template.
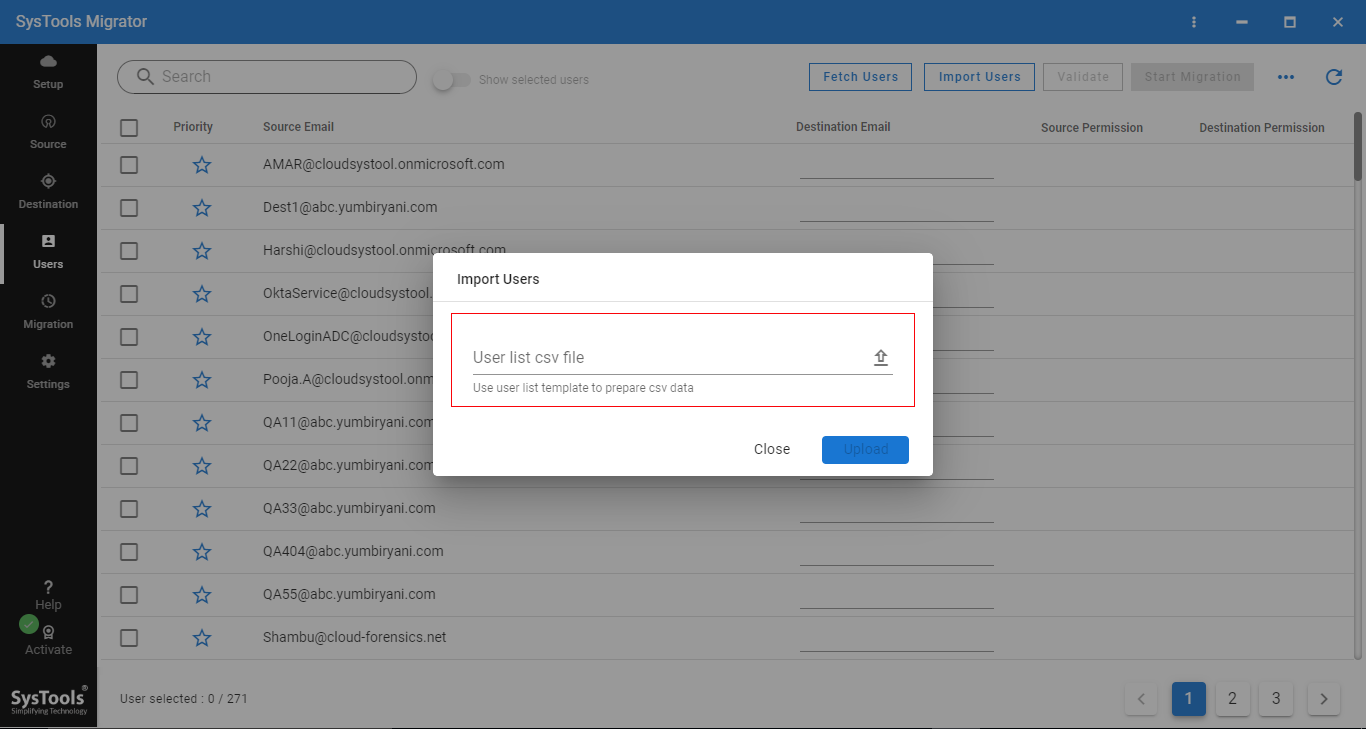
Step 9. Next, you will see both the source and destination users appear on the window like this.
Step 10. Now, perform final verification to validate the source & destination permissions.
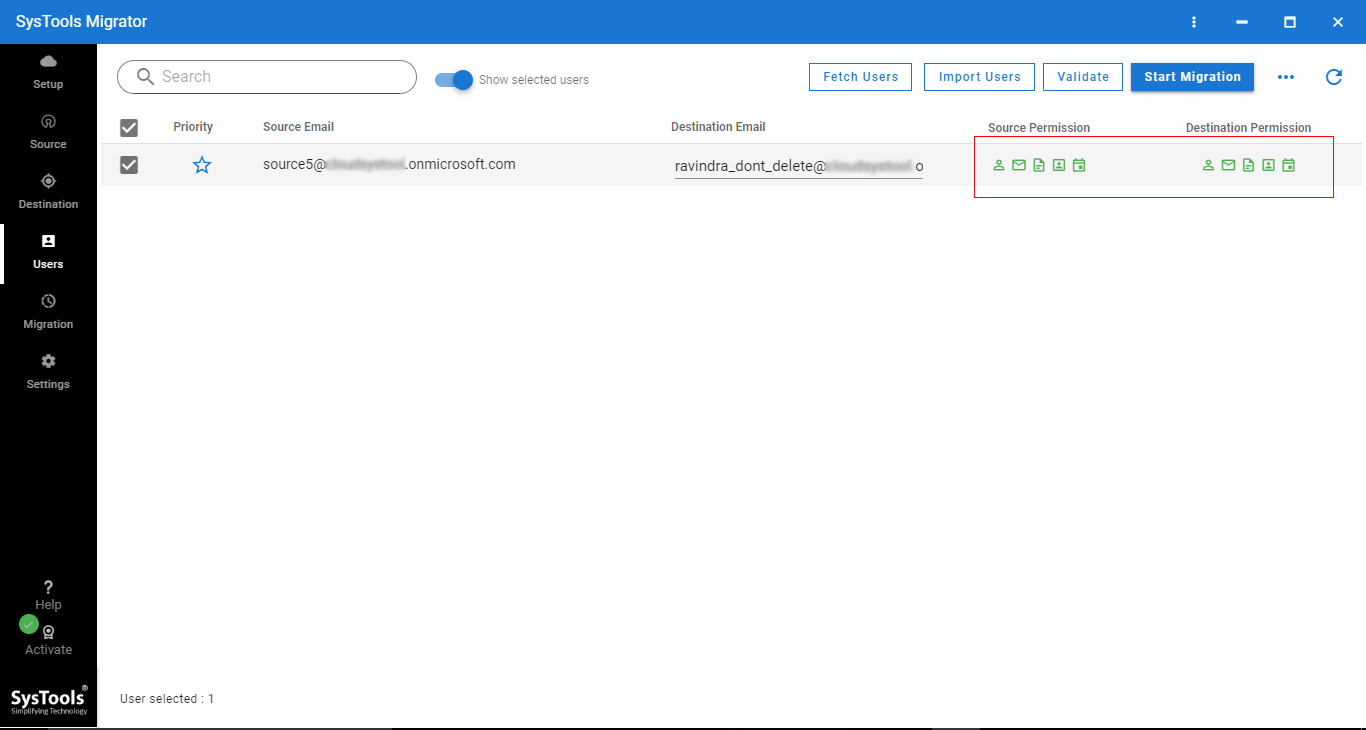
Step 11. Once you see all the necessary permissions turn green for source and destination, click on the Start Migration button to migrate / forward emails from one Office 365 account to another.
Conclusion
After reading this write up you must have got an idea that forwarding emails are not the best option when you have a large number of emails. So, instead of trying to forward email to multiple users in Office 365, you can always opt for migrating the same.
And, now you have the tried and tested software with the help of which you can easily and quickly migrate your emails to their destination address. Hence, utilize the tool & perform the migration.


