How to Migrate Microsoft Office 365 to Google Workspace? Complete Guide
Summary: This article provides multiple methods to migrate Microsoft Office 365 to Google Workspace. You can either choose to do it manually or opt for the quick migration process. Go through this guide and learn the best way to perform this operation without any data loss or hassle.
No matter how many ways there are to get your work done, businesses need a multitude of applications. To support so many apps, bulky hardware installations are required which ultimately results in a staggering amount of financial strain. So, more and more businesses are adopting cloud apps, and Microsoft 365 and Google Workspace are the best examples of such cloud suites.
However, not every business is able to choose the best application on the first try. So, the need arises to move from one app to another to increase business productivity. Similar to this situation here, we are discussing how to migrate Microsoft 365 to Google Workspace.
Let’s get started.

Before getting into the different ways let’s have a quick look at the most reliable way to perform this task.
5 Quick Steps to Migrate Microsoft Office 365 to Google Workspace
- Step 1. Download & Run the Software on PC.
- Step 2. Choose Office 365 & G Suite Platforms.
- Step 3. Enable Required Workload & Apply Filter.
- Step 4. Login & Authenticate Admin Credentials.
- Step 5. Create Mapping & Start Migration.
DMS for Microsoft Office 365 to Google Workspace Migration
Google Workspace provides a native Data Migration option. However, using it is no easy task. First, you will need to fulfill some pre-requisites:
- Create the destination Google accounts
- Set up roles for Microsoft 365 accounts
We will assume that you have already created the destination accounts at this point in time. Now, let us find out how to set up roles for the O365 account:
Step 1. Sign in to a Microsoft 365 account.
Step 2. Open Admin panel.
Step 3. In the desktop version, go to Apps >> Security & Compliance >> Exchange.
Step 4. In the web version, directly click on Exchange.
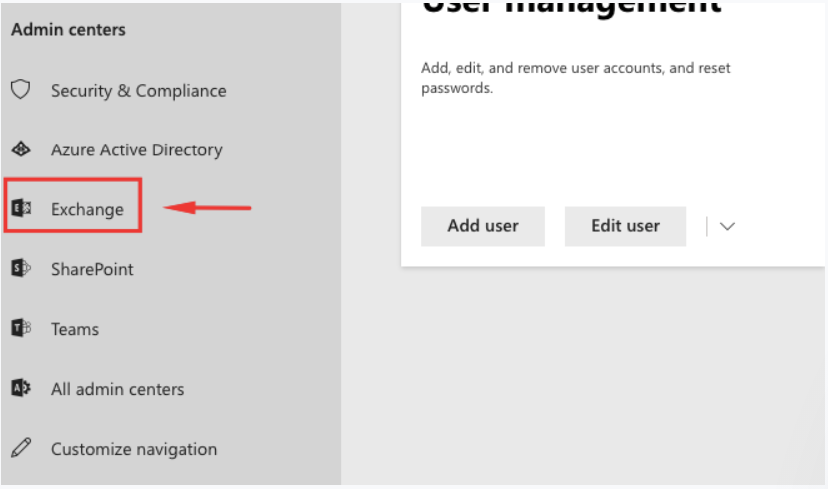
Step 5. Click on Permissions.
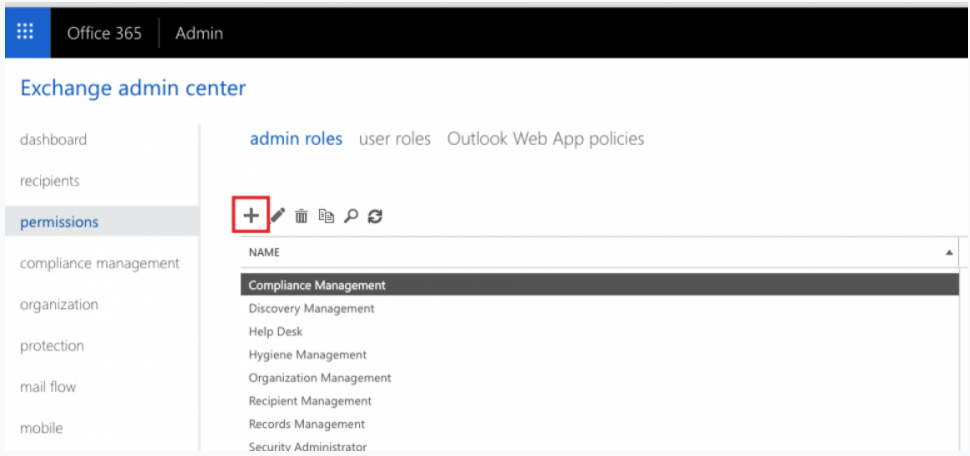
Step 6. Click on the + icon and input the Name field. In the Roles section, click on + again. Add two roles here – ApplicationImpersonation and ViewOnly-Configuration.
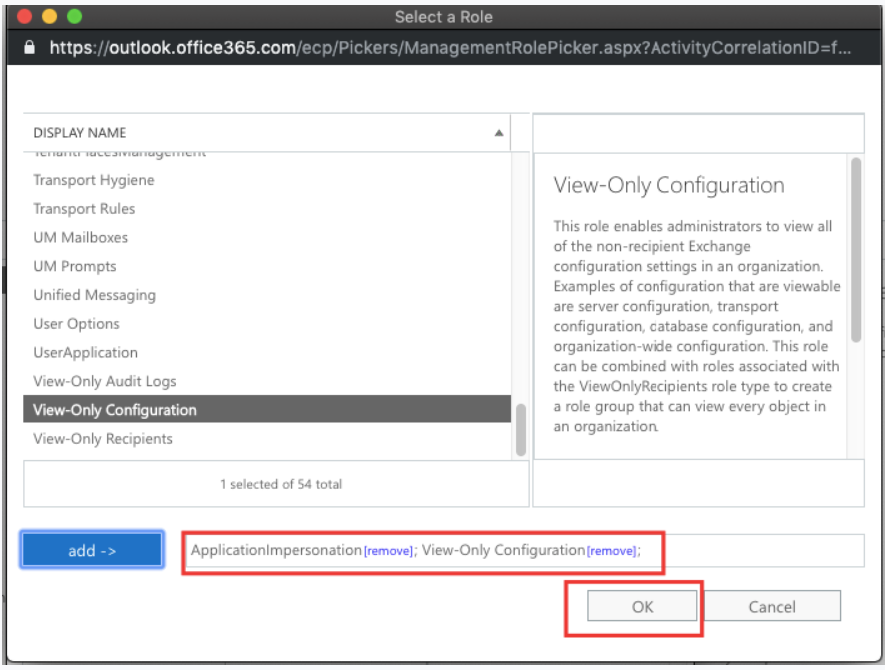
Step 7. Click the Save button.
Step 8. Now, go to User Roles and click on the + button.
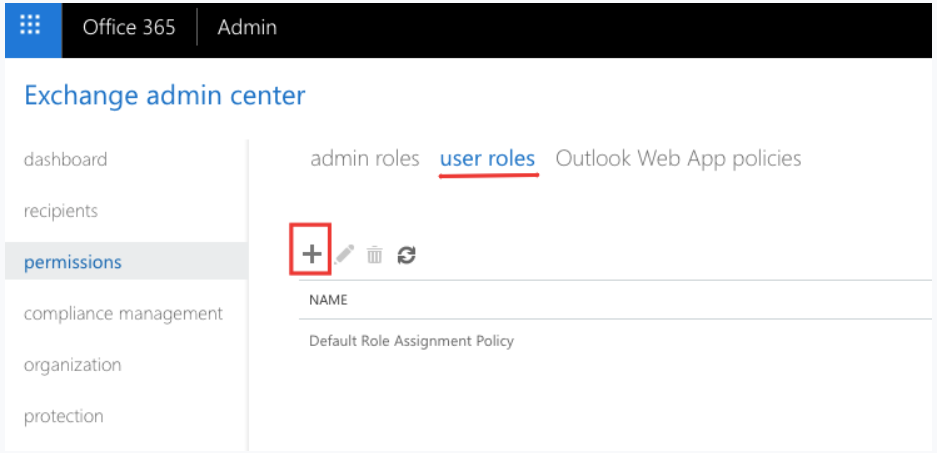
Step 9. Add one account that is to be used to connect to Office 365, preferably the admin account. There is no need to add all accounts for Office 365 to Google Workspace migration.
Step 10. Wait for 30 min as the changes will take some time to take effect.
Once the prerequisites are taken care of, it is time to migrate Microsoft 365 to Google Workspace account.
Now Comes the Actual Migration
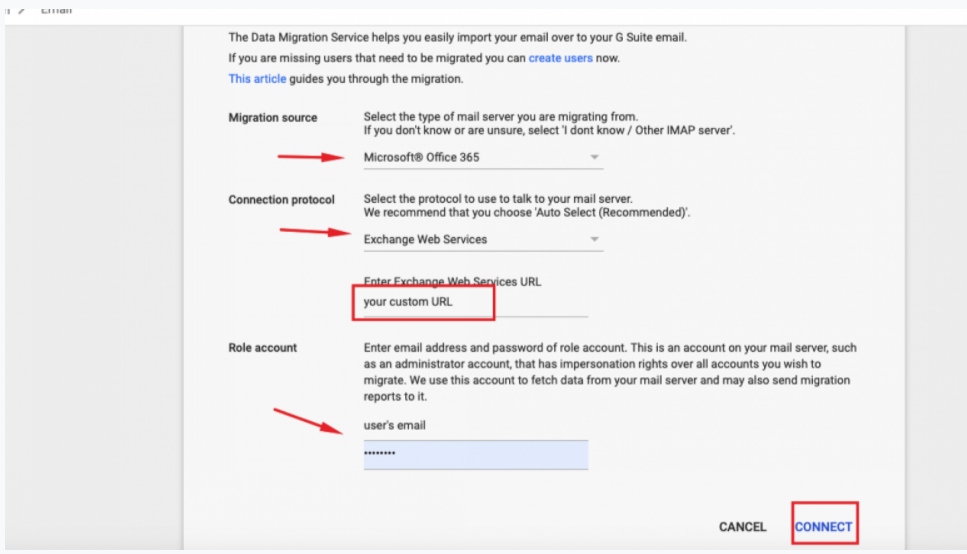
Step 11. Go to the Google Workspace admin console and click on Data Migration.
Step 12. Select Email.
Step 13. Now, fill in the following details-
Step 14. Migration source – Microsoft Office 365
Step 15. Connection protocol – Exchange Web Services
Step 16. URL – Web address of migrating Outlook account
-
- Role – Email ID and Password of Account used in Pre-requisite
Step 17. Click on Connect.
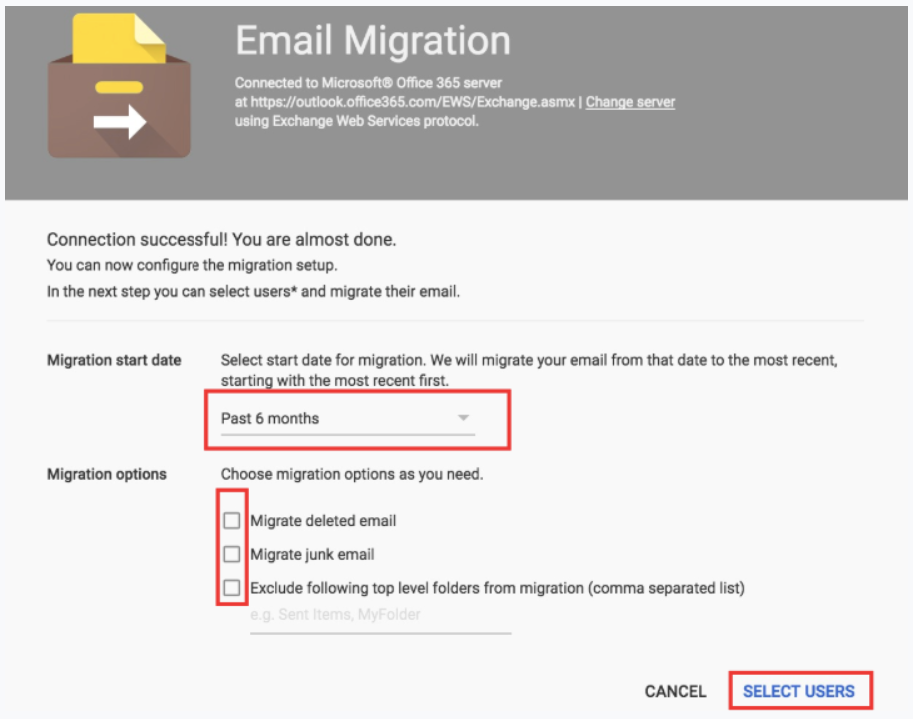
Step 18. Choose a migration date and options according to your requirements and click on Select Users.
Step 19. Click Specify the source Google Workspace accounts to migrate data from and the destination Office 365 accounts to move data into.
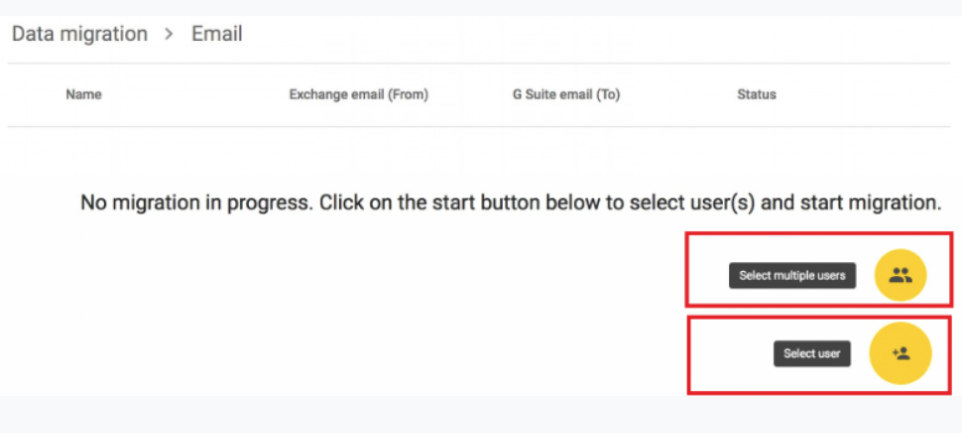
Step 20. Click Start.
It will take a lot of time to migrate your data. So, make sure to keep yourself occupied in the meantime with other tasks.
Migrate Microsoft Office 365 to Google Workspace Using the Software
If you want a smooth transition between your cloud suite and to streamline the Microsoft 365 to Google Workspace migration process, a professional tool will be the best choice.
Some Key Features:
- Move Office 365 Emails, Contacts, Calendars, Document
- Date-range filters for migration
- Multiple ways to add involved accounts
- Migrate specific accounts on Priority-basis
- Allows concurrent migration for speedy migration.
- Allows delta migration to migrate newly arrived data.
Also Read: How to Migrate Exchange 2016 to 2019 And Transfer the Mailbox Data?
Software Working Steps to Migrate Microsoft Office 365 to Google Workspace
Step 1. Download the software on your computer and launch it. Choose the source platform as Office 365, and the destination platform as G Suite.

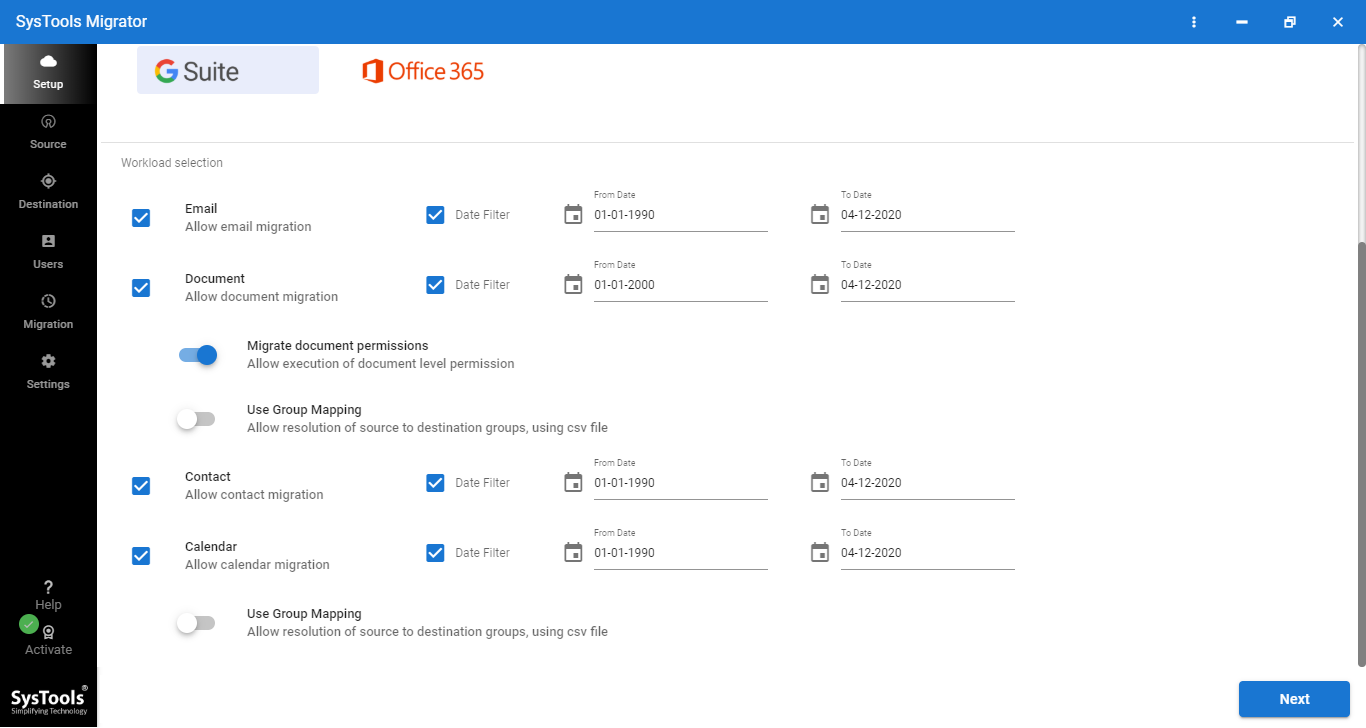
Step 2. Now move to the workload selection area, and enable the required mailbox items to migrate. Use the date filter option to migrate Office 365 to Google Workspace selectively. Click on next.
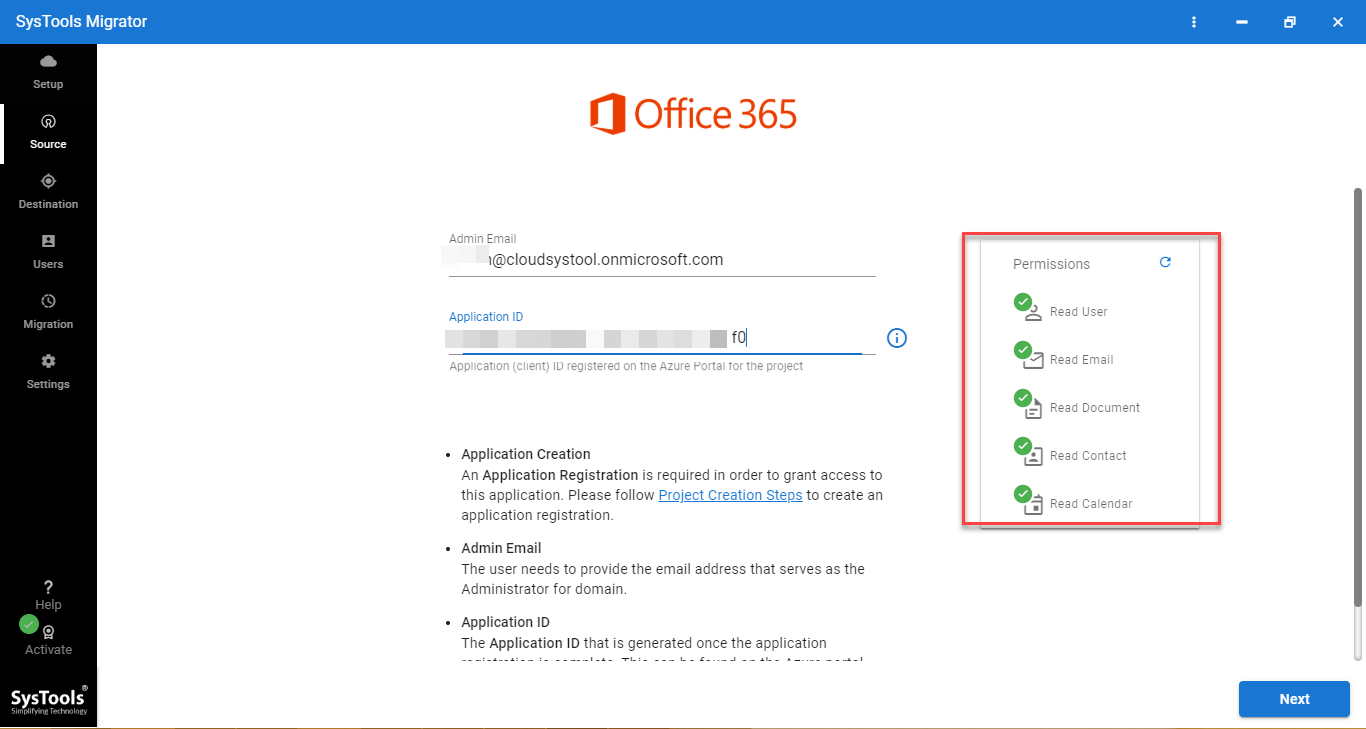
Step 3. In the source tab, use the source Office 365 admin credentials such as Admin Email and Application ID to log in to the software. Click on the validate button to validate the required read permissions.
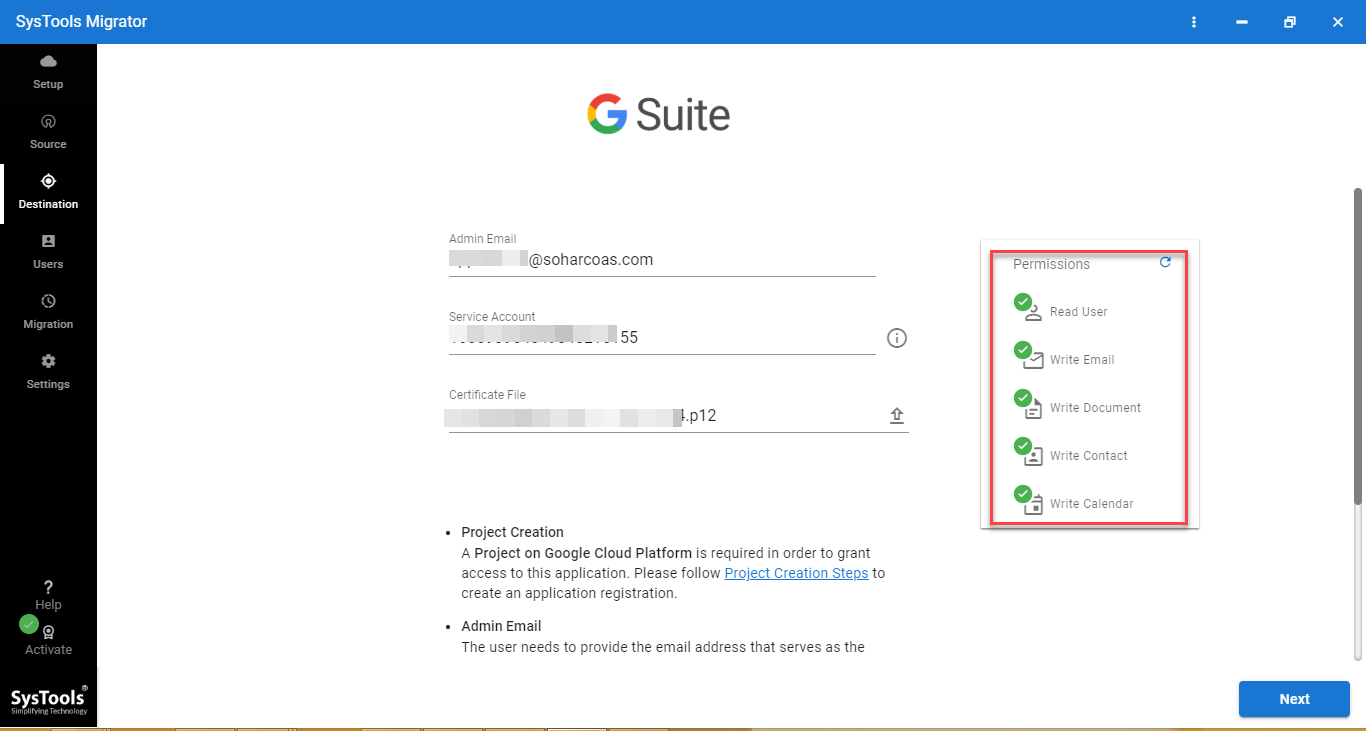
Step 4. Moving to the destination tab, use the Admin Email, Service Account ID, and Certificate file of the destination G Suite account to log in to the software. Click on the validate button to validate the required write permissions.
Step 5. In the user’s tab, add the desired user accounts that you want to migrate from Office 365 to G Suite. You can add users using three ways –
- Fetch Users – This option fetches all the user accounts associated with an admin account.
- Import Users – Using this option you can import a CSV file containing the user details.
- Download Template – With this option, you can get a sample CSV file, which you can use to create the mapping between the source and destination user accounts.

Step 6. Now in the same tab, select the source and destination user accounts and click on the validate button to authenticate the required permissions.
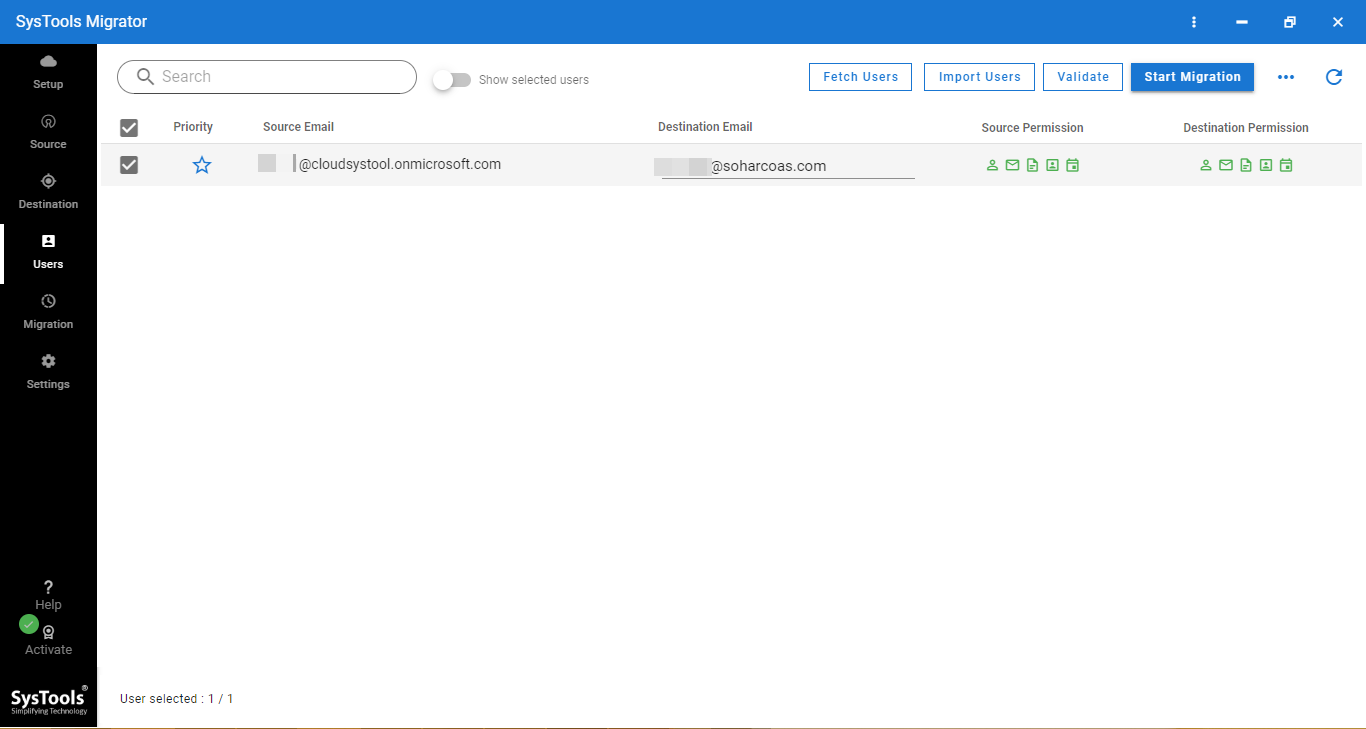
Step 7. Finally, click on the start migration button to Migrate Microsoft Office 365 to Google Workspace.
Also Read: How to Export Office 365 Calendar to Outlook? Read This to Know!
Final Verdict
It is safe to say that the manual process to migrate from Microsoft 365 to Google Workspace is not easily understood by users. The best way to go about this migration is to make use of a professional solution. The recommended solution comes from a reputable brand known for handling email data. And thus you can trust this application to do the job for you.


