How to Restrict USB Access in Windows 11, 10, 8, 7?
Are you looking for a solution to restrict USB access in Windows 11, 10, 8, and 7? If yes, then in this article we will introduce two ways to banned USB access in Windows PC. Stay with us until the end of the blog.
While the USB on your computer can be used to connect your mouse or external hard drives, they can also be used to transfer malicious malware to your system, which can be detrimental to your personal security. A lot of people think that having a restricted USB on their computer means that they’ll need to block USB access .
Windows is one of the best operating systems released in years. Windows 10 is fast, it’s easy to use, and it’s compatible with all of your hardware and software. It’s an incredibly easy system to use. But there’s one big flaw: we have to secure your data without any hassle, even if all your data is on the desktop and you can access it offline, but there is fragile data that you are worried about. Then what do you do in this case? So, here we are talking about how to restricted USB access on Windows 11, 10, and 11.
So, before starting the topic, we have a scenario…
4 Steps to Restrict USB Access in Windows 11, 10
- Download the tool and register with a valid email account.
- Enter the Master Password and Confirm the password.
- After this, click on the Block button to block the USB.
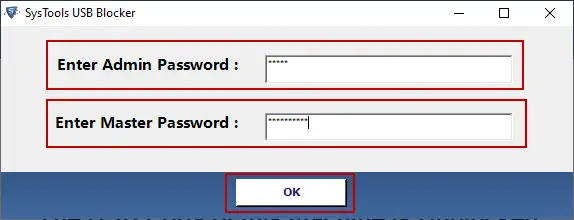
- To block the USB, enter the Admin Password and Master Password.
Why Need to Restricted USB Access?
While there can be many reasons, there are mainly two:
- Virus Protection: Since a USB can easily be used with multiple devices, it often contains malware that can be harmful to your device.
- Data Privacy Protection: You may want to protect your data and prevent others from copying your important files by connecting a flash drive. For example, you may be a network administrator or have a small business with few employees and want to keep your data more secure.
Manual Way to Block USB in Windows 10
- Firstly, to open the Run windows, you have to press the Windows key + R.
- Secondly, type “regedits.exe” and click the OK button.

- Then, after opening Registry Editors and following the navigate path:
HKEY_LOCAL_MACHINE > SYSTEM > CurrentControlSet > Services > USBSTOR
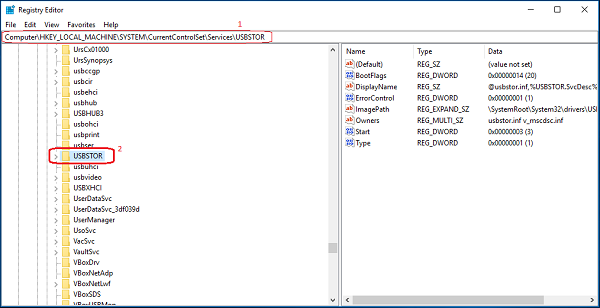
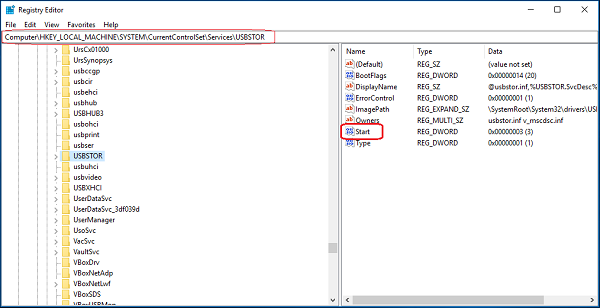
- Now, click on the Start button to open the “Edit DWORD (32-bit) Value”.
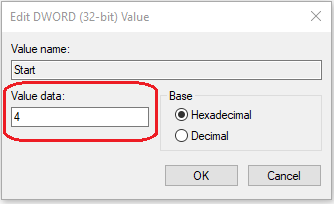
- After that, to restricted the USB drives, change the “value data” as you want to block like “4” and click the OK button.
- Finally, restart your Windows Operating system and see the affected result.
And, that’s it. But in this method their some restriction and drawbacks.
Restrictions of Manual Task
- To attempt this method you need the proper technical knowledge required.
- User having access to the system can enable the blocked USB device.
- The steps will vary according to windows OS versions
Expert Solution to Restrict USB Access in Windows 11, 10
The Best USB Blocker Software to easily restricted USB access on Windows 11, 10, 8.1, 8, and 7 without running into any issues. This software performs a very important function by blocking USB.
This lock unwanted users from accessing USB devices on the system. It also ensures that no data is extracted without the presence of the user. This utility is designed using high-tech algorithms. However, it offers a GUI that is very simple for both technical and non-technical people. Users can easily operate the program and install it without technical knowledge.
Complete Guide to Restricted All USB Access on Windows 11, 10, 8
First, download and install the tool on Windows. Now enter a valid email address to request an OTP (One password).
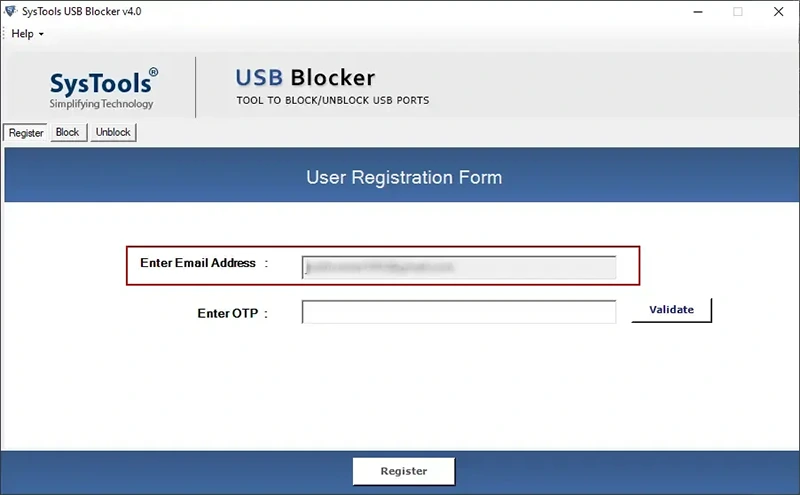
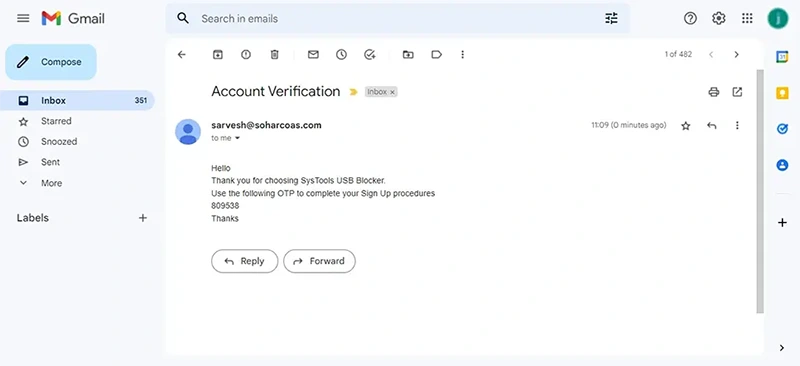
- Now check your email for an OTP, copy or type it.
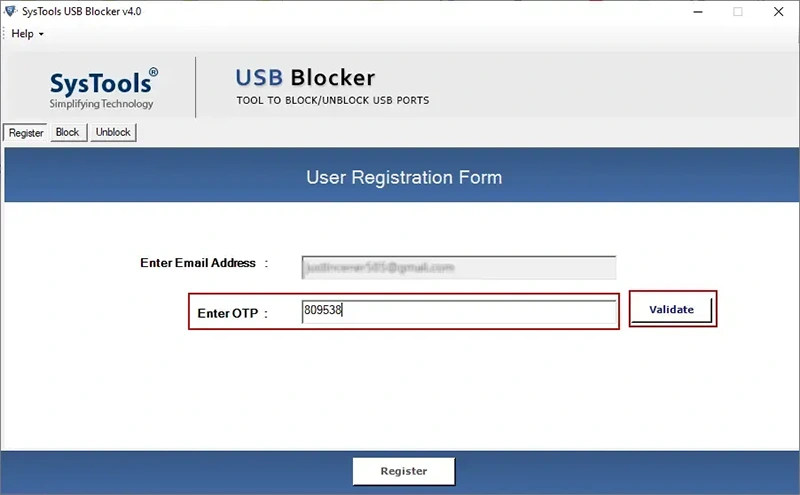
- Enter or paste the OTP received at your email address. Then click on the “Validate” button.
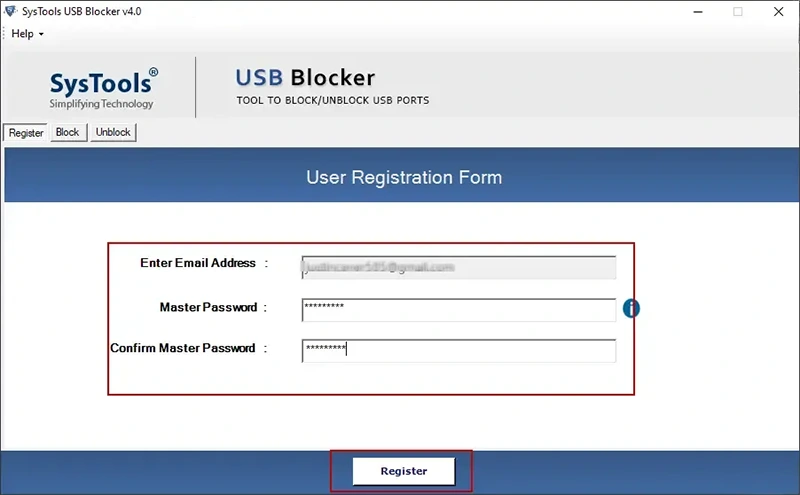
- Next, you need to create a master password. So write down your master password and re-enter it to confirm.
- After setting the master password, a pop-up message informs you that the user registration is complete.
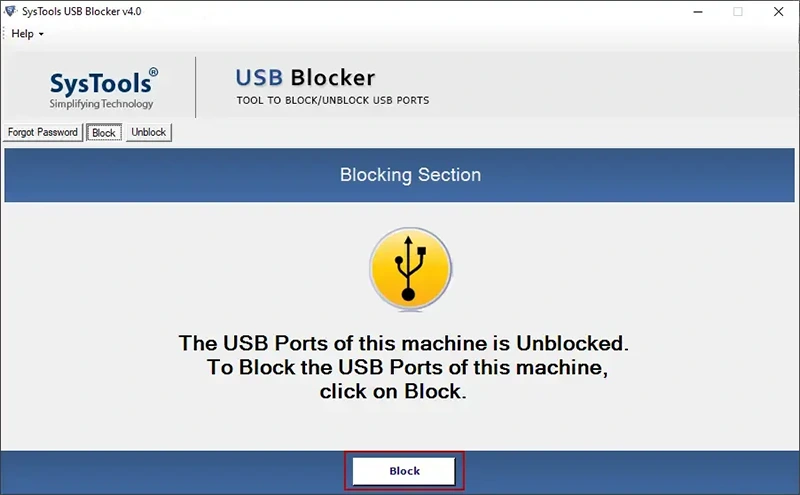
- Now click on the “Block” button to block the USB on your computer.
- In the next window, enter the administrator password (user system password) and the master password created during registration.
- After locking the USB, a pop-up will appear indicating that the USB access is locked.

Why Should Choose this Software
- Recovering a lost user password using an email address.
- Set a new password to unlock and block the USB drive.
- Log back into the user’s device to block USB on multiple computers.
- It runs easily on almost all versions of the Windows operating system.
- This software has an easy interface that can be operated by non-technical users.
- Only the administrator who has the password can block USB in Windows 11, 10, and below versions.
Final Words
In this blog, we will talk about restrict USB access in Windows 10 using manual and professional methods. The manual Method is free and best for personal users, but it has some drawbacks. It’s better to save your time and hard work and go with the professional solution using the USB Blocker Tool to restricted user-level and admin-level USB in Windows 10 and other versions.
Frequently Asked Questions
Q: Does this software also restricted USB mouse and keyboards?
Yes, the software can committed all the USB, which include the USB Mouse, Keyboard, and other devices.
Q:Does this software work on Mac OS?
No, this software does not work on MAC operating systems; it only works on all Windows versions.
Q: Does this software have a free demo version?
Yes, this tool has a free demo version to test all the features for a week.


