How to Export Emails from Windows Live Mail to Outlook PST Messages?
This write-up will educate you on, how can you migrate and move Windows Live Mail to Outlook all versions with complete data. The explained methods are tested and verified by IT experts. So, you can follow the steps and import Windows Live Mail to Outlook.
Windows Live Mail is no longer supported by Microsoft as of January 10, 2017. It is therefore not advisable to still use the Windows Live Mail program. In this article we discuss, how can you switch to the Outlook program.
Here I want to ensure that, you can easily transfer complete data (emails, contacts, calendars, etc.) from Windows Live Mail to Outlook. In the case of contacts, you can do it manually (free). But for emails, it is advised to use a trusted way only.
Import Windows Live Mail Emails to Outlook – 100% Safe
If you don’t have access to your Windows live mail program then you cannot perform any manual solution. In such a situation you need a stand-alone solution. With the help of the Emaildoctor program, you can easily transfer emails from Windows Live Mail to Outlook. Perform below-mentioned steps:
4 Steps to Convert Windows Live Mail Messages to Outlook
Download Windows Live Mail To Outlook Purchase Now 100% Secure
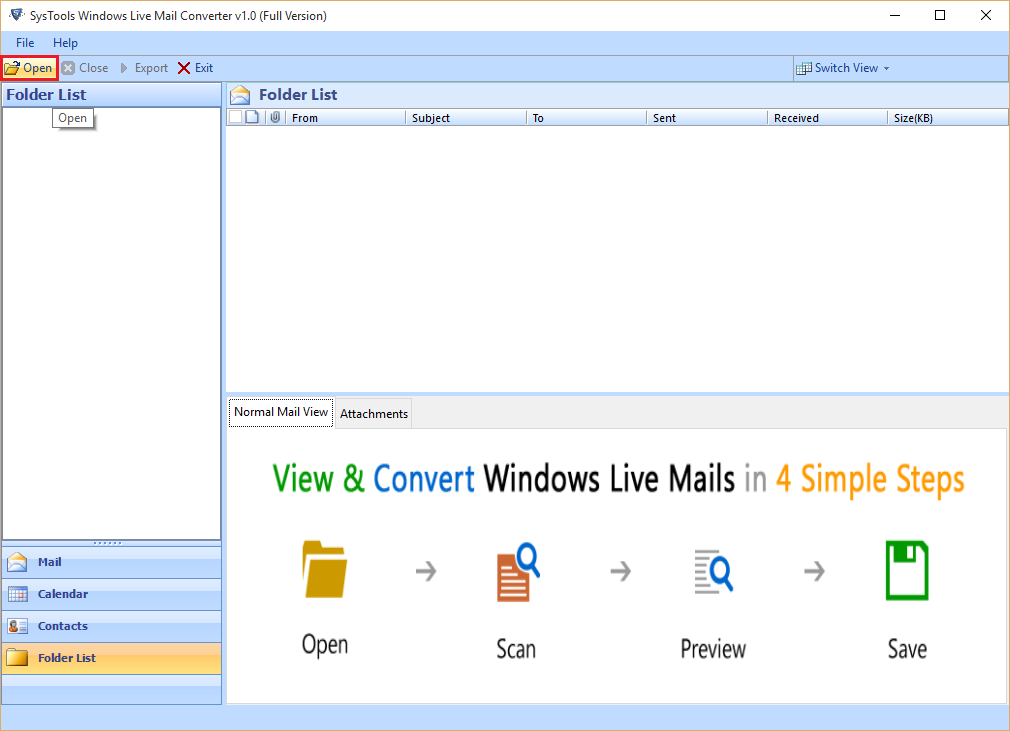
Step 1: – Download software to perform Windows Live Mail to Outlook Migration. After launching tool click on Add File button.

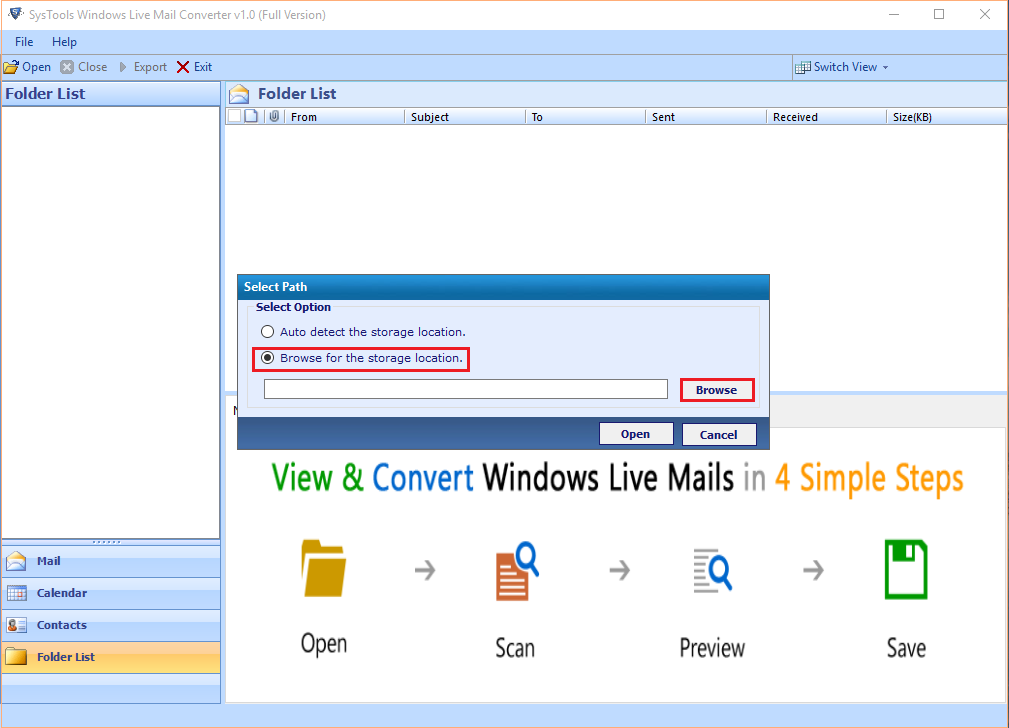
Step 2: – Browse Windows Live Mail Emails into software panel and explore folders.

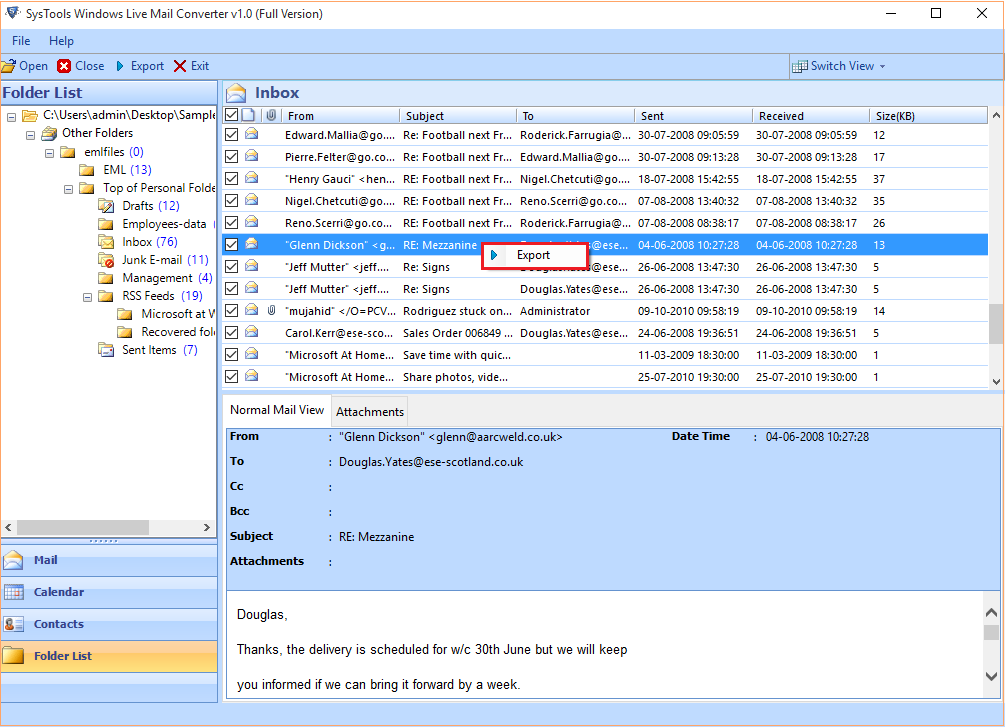
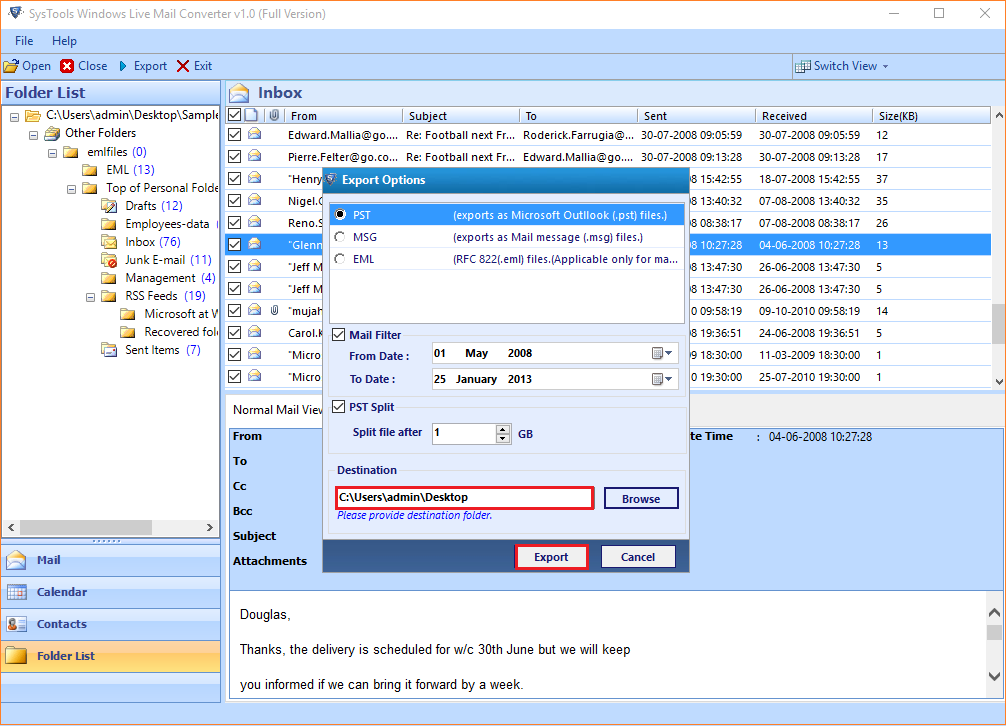
Step 3: – Preview emails along with all attributes and select PST, after that click on the Export button.

Step 4: – After export process, import PST, generated from Windows Live Mail into Outlook 2019, 2016, 2013, 2010, 2007, etc.

Steps to Move Only Contacts from Windows Live Mail to Outlook Manually
To transfer only contacts from Windows Live Mail to Outlook, first, create a special file that contains all your contacts. Save such a CSV file in Windows Live Mail as follows:
- Start the Windows Live Mail application on your system.
- Click on Contacts in the bottom left.
- Click on Export at the top.
- Click File with comma-separated values (.CSV).
- Click on the Browse button.
- Select a folder on the computer to save the file.
- Think of a suitable file name, for example ‘WLM Address book contacts’.
- After that Click the Save button.
- Click on Next button.
- Determine which data, such as telephone numbers, nicknames, you want to transfer.
- Click on Finish.
Note: – The CSV file with the address book is stored on the computer. Now we must first make the CSV file readable for Outlook (all versions).
- Open the Windows Explorer.
- Go to the CSV file.
- Right-click on it
- Select Open with.
- Click Notepad.
- Notepad opens. Click on Edit in the menu.
- Now click Replace.
- Type in “Search for” the semicolon: ;
- Enter next to ‘Replace with‘ a comma: ,
- Click Replace All.
- Close the ‘Replace‘ window by clicking on the cross.
- Click on File in the menu and click Save.
- Close the Notepad.
Now it’s time to transfer the contacts Windows Live Mail to Outlook program:
- Start Microsoft Outlook application.
- Click File on the top left.
- Click on Open.
- Click Import/Export.
- Click Import data from another program or file.
- Click on Next.
- Click Comma-separated values.
- Click on Next.
- Click on Browse.
- Go to the CSV file that you saved, click on it, and then click OK.
- Click on Next.
- After that Click on Contacts.
- Click on Next.
- Click on Finish button.
- All contacts are now imported into Outlook.
Note: – This free manual method to import contacts from Windows Live Mail to Outlook. Use these steps only for contacts migration.
Final Words!
You reached this point, which means that you have gone through all the points explained above. According to my experience, you should use the software explained above to migrate from Windows Live Mail to Outlook. For Contacts only you can try the manual method. But be attentive while performing steps.


